posted on November 11th, 2008 ·
The biggest meet, at Rutgers, is coming up in less than a month. I am doing more sprints and learning to pace myself in my workout. On the day of the meet, not only do I have to swim my events, but I also have to give myself ample time to warm up and cool down.
Warm up
- 300 freestyle
- 4 x 100 freestyle w/ fins
- 300 flutter kicks
Drills:
- 4 x 25, half sprints and half long strokes for each set
- 4 x 100, sprint the last 5 meters and do flips in each lap
Main sets:
- 1 x 200, 70% race speed and focus on stroke techniques
- 4 x 25 freestyle sprints
- 4 x 50 sprints, under 1 minute
- 2 x 100, 80% race speed
- 200 flutter kicks
- 3 x 100 freestyle sprints, under 2 minutes
- 3 x 100, 50 freestyle and 50 breast stroke
Warm down:
- 200 freestyle, nice and slow
Total distance (in meters): 3,200
Tags: Exercise
posted on November 10th, 2008 ·
Warm up:
- 400 freestyle
- 4 x 100 pull buoy
- 8 x 25, half sprint and half long strokes
- 200 kicks
Main sets:
- 5 x 50, 25-yard sprint and 25-yard long strokes
- 5 x 100; 50-yard 1-arm swim followed by 25-yard catch up and swim each
- 9 x 100 intervals, 3 sets of 2:30, 2:15, and 2:00
warm down:
Total distance (in yards): 3,050
Tags: Exercise
posted on November 8th, 2008 ·
Winter squashes (a generic term for all types of squash sold in the market) are everywhere, and they are cheap and delicious. I will be experimenting with a squash recipe every week this fall (possibly in the winter too), and I’d like to share my experiences with you. I hope you will enjoy reading my culinary adventure as well as learning new recipes to cook for your friends and family.
Carnival squash has a hint of butternut squash’s earthy smell when split open. I have had the squash sitting on my kitchen counter for a week and finally decided on baking a loaf of squash bread. The recipe is similar to banana bread; combining shredded squash (mashed banana in banana bread) and an egg batter with all-purpose flour.
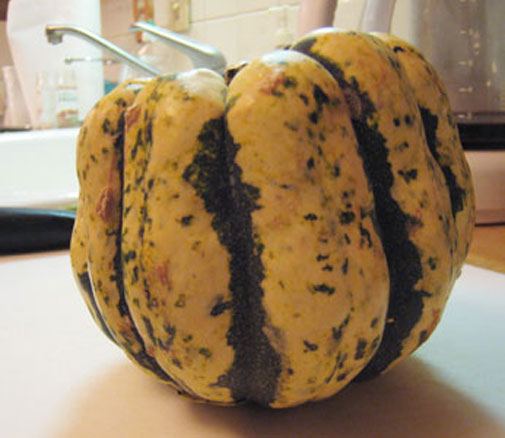
The carnival squash.
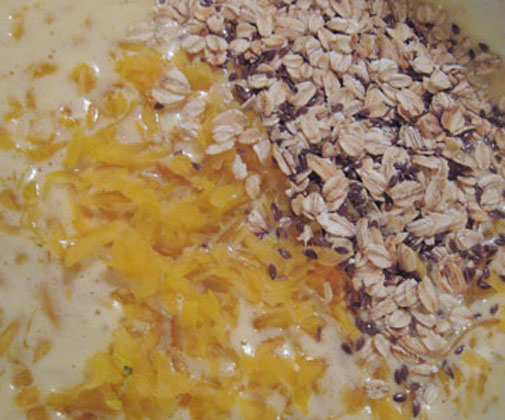
The bread batter:
Wet Ingredients:
- 3 cups shredded carnival squash
- 3 eggs beaten
- 1 - 1/4 cup sugar (added in after eggs are well beaten)
- 3/4 cup vegetable oil (added in after eggs and sugar are combined)
- 1/4 cup apple cider
- 1/4 cup toasted traditional roll oats (not instant oats)
- 1/8 cup toasted flaxseed
Dry ingredients:
- 2 - 1/4 cups all-purpose flour
- 2 teaspoon cinnamon
- 1/2 teaspoon kosher salt
- 1 teaspoon baking soda
- 1/4 teaspoon baking powder
Mix the dry ingredients with wet ingredients after they are mixed separately. You will still see a wet batter instead of a regular bread dough. Dump the batter into a loaf pan and bake the batter for 1 hour and 10 minutes, give or take, in 325-degree oven.

A loaf of Carnival Squash Bread.
To check if the bread is done or not, stick a tooth pick into the center of the bread and take it out, if the toothpick is clean when it comes out, then the bread is done.
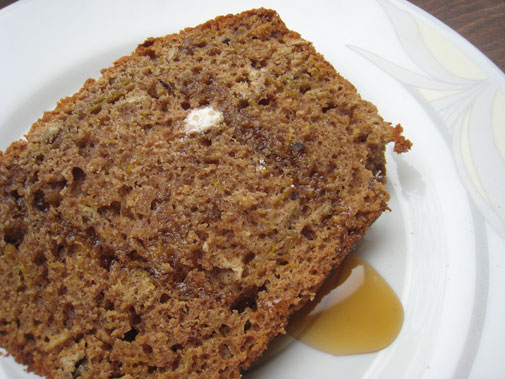
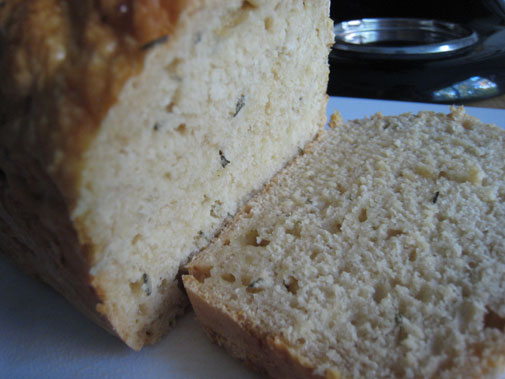
A slice of squash bread drizzled with maple syrup.
Let the loaf of bread rest for 10 to 15 minutes before slicing it. Resting will help the interior of the bread bind tighter.
Go ahead, guinea-pig another type of squash in your next loaf of homemade bread!
Tags: Diet
posted on November 7th, 2008 ·

As the economy struggles, many people have been spending less on food. Our logic would tell us that less spending means less food eaten, and less food eaten means little weight gain. However, according to LA Times, spending less actually creates more weight related problems, like obesity, diabetes, or heart diseases. These health problems come from eating cheap and processed foods. Highly processed foods, such as sweets made with refined sugar, are sold cheaply in the store because of their long shelf life, and they are also packed with a lot of saturated fats.
As a whole food advocate, I firmly believe that we do not need to sacrifice our health and palate even when our wallets are thinning. Here’s list of cheap, but healthy ingredients that you can incorporate into your diet:
- cabbage: contains vitamin C, iron, calcium, and potassium, all essential for our cells to function properly
- winter squash: helps fighting cancer cells; prevents benign prostatic hypertrophy(BPH) for men
- beans: high in fibers and proteins, which can be used as a substitute for source of protein when meat is expensive
- root vegetables: potatoes, carrots, onions, etc, are abundant all year round. They are the ultimate cheap and versatile ingredients that should be in everybody’s kitchen
- tap water: don’t be surprised…many of us, including me, like to use store bought broth to make soup or sauce. However, a box/can of chicken broth usually costs around 3 dollars, which is not cheap in my opinion, for “flavored water”. Therefore, switch to using water (or make your own broth) for soup or sauce. You can also use this opportunity to challenge your seasoning skills!
I am in the same position as you are, trying to live frugally as we no longer have the luxury to spend money freely. However, I will not, neither should you, give up the passion of eating wholesome and delicious food.
Tags: Diet
posted on November 6th, 2008 ·
baking his first apple pie!
I baked the pie last night and I am pretty happy with the result in my first try.
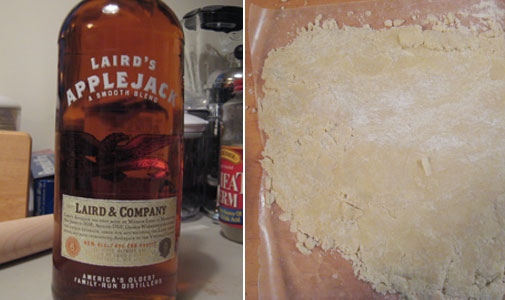
Instead of using cold water, as most pie crust recipes recommand, I used applejack as the liquid to bring dry ingredients (flour mixed with chunks of butter, salt, and sugar) together.
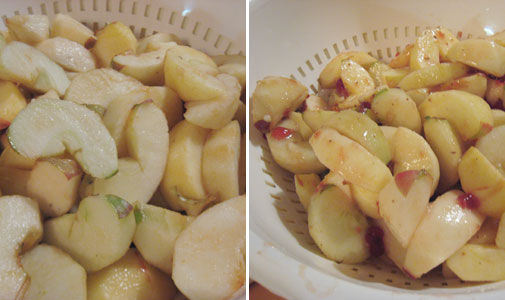
I drained the apple slices with 1/4 cup sugar for 1 hour and half before tossing them with 2 tablespoons red currant jelly, another 1/4 cup sugar, 2 tablespoons freshly squeezed lime juice, 1 tablespoon apple cider, and 1/4 teaspoon freshly ground caraway seeds.

After chilling the pie dough for few hours, I rolled it out and carefully put it inside the tart pan. The bottom of the tart pan can come off for easier pie crust assembly…one of the good reasons for using a tart pan instead of pie pan.
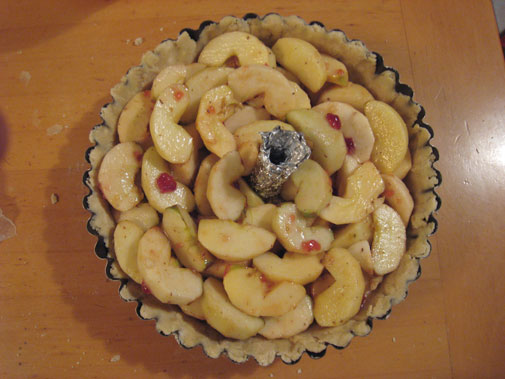
Apple slices went onto the pie crust immediately. The little chimney in the middle of the pie is called a pie bird, which I didn’t have. Therefore, I made one with aluminum foil. The pie bird lets the steam out during baking process (very important unless you want your oven be splashed with pie juice).
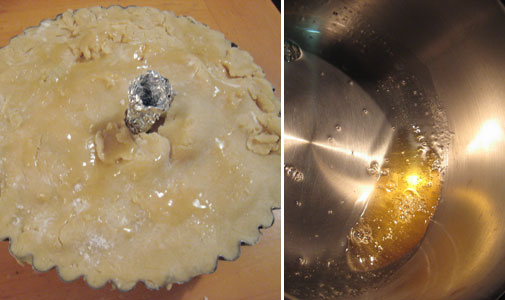
Once the apples are set, I sealed the pie with another layer of crust, followed by brushing on some apple glaze, made from the apple juice drained previously.

And there is my apple pie!
Baking an apple pie takes two steps:
1. Pre-heat the oven to 425 degrees. Set the pie at the bottom of the oven (not on any rack) and bake for 25 to 30 minutes.
2. Transfer the pie onto a rack placed in the lowest level of the oven, and bake for another 20 to 25 minutes.
After baking…chill the pie to room temperature, which is the hardest part, because many of us will be tempted to take a bite right away.
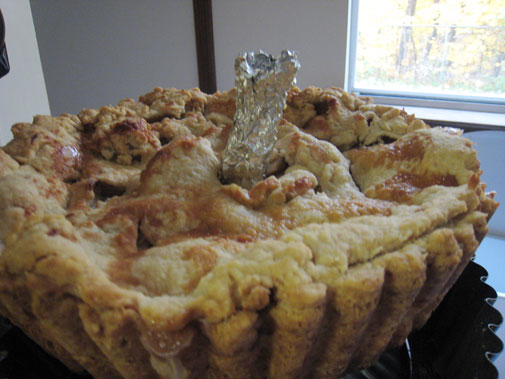
Another great reason for using a tart pan, you can have the side crust still intact when slicing the pie!
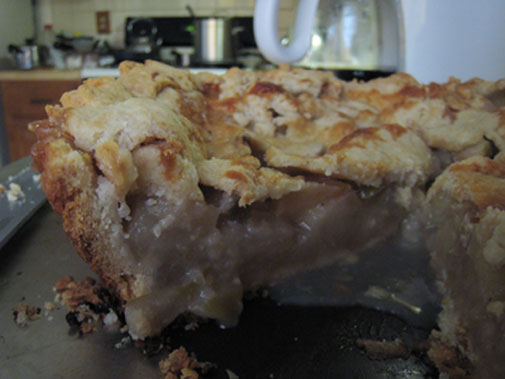
A closer look of the inside of the pie. I learned an important lesson - must cut the apples evenly. I didn’t have an apple slicer or a melon baller to de-core the apples. By using a pairing knife to cut the core out, I produced uneven slices and caused some pie juice not coagulated during the baking process. Some juice was coming out in the picture, if you look carefully.
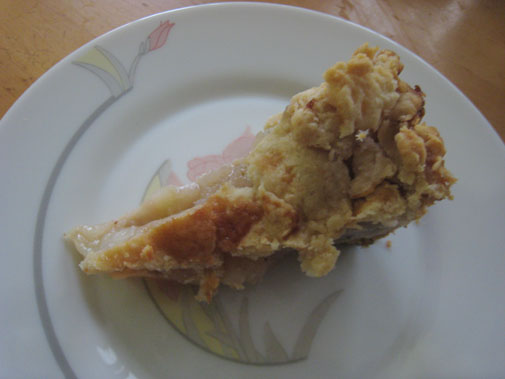
A slice of homemade apple pie…what a luxury!
Bake a pie in this holiday season! Guinea-pig different pie fillings, and I guarantee that you will have the most fulfilling fall/winter ever!
Tags: Diet
posted on November 5th, 2008 ·

I have been working on my swimming stroke relentlessly in the pool. However, after a significant improvement from being a beginner to a mediocre swimmer, I have hit a plateau. I know that “plateau” is just a phase, and I will eventually get over the hump (for all of you who are or have been in my position, don’t give up!). To get through the plateau, I have been adding more lower back exercises to help me to increase my core strength. Remember, core muscles wrap around your mid-section, not just your abdominal.
Here are some lower back exercises that I have been doing:
- Straight leg deadlift - hold the barbell in front of your body and bend your knees slightly to avoid hyperextended knees. Keep your back upright and slowly bend over by using your hips and do not slouch. Once you feel that your back is bending, lift yourself up by using your hamstring and lower back strength. The secret to have a good form in this exercise is to have your butt sticking out in the down-phase. Your glutes are the strongest muscles and they will help to you stay in a neutral position.
- Lower back lifts with extended arms - place yourself facing the floor with a stability ball tucked under your hips (place your feet against a wall to stabilize your body). Lift your upper body with your lower back strength. Start with your hands behind ears, then do the same exercise with arms extended to the front and hands on top of each other once you get stronger.
- Inverted 1-arm rows - do 1-arm rows standing up with the free arm extended to the front and one of the legs extended to the back.
- Superman - similar to lower back lift (from above), but start with your arms attached to your torso and extend them fully on the up-phase of lower back lift.
Do you have any great lower back exercises that I can guinea-pig?
Tags: Exercise
posted on November 4th, 2008 ·
Warm up:
- 300 freestyle
- 4 x 100 dolphin kicks w/ freestyle stroke
Main sets & drills:
- 3 x 200 freestyle w/ fins
- 4 x 100 freestyle
- 200 kicks
- 4 x 200 freestyle
- 100 1-arm swim & 100 kicks
- 2 x 400 freestyle
- 100 backstroke kick
Total distance (in meters): 3,800
Tags: Exercise
posted on November 4th, 2008 ·

I had had a chaotic schedule in the last few days. I had been busy studying for my biochemistry exam (which thankfully is over) and devoted less time in the kitchen. Nevertheless, I made a creamy potato stew (or soup) for the weekend.
With some leftover pale ale still sitting in my refrigerator, I decided to make “creamy potatoe soup”. Making the soup is simple; sautee any kind of aromatic vegetables (onions, carrots, celery, bell peppers, etc) first, then dump in the potatoes with whole milk (instead of chicken broth) and cook until the liquid is thickened and potatoes softened. Make sure to stir the soup occasionally to avoid scorching (coagulation of protein). The soup should be ready in 40 minutes. Making soup is one of the best ways to manage your diet when time is not your side. Once the soup is made, you can put noodles, dumplings, poached fish, or beans in it, and have a healthy and hearty meal within 10 minutes.
I also made “pocket pies” to help me get through the stressful weekend. Once the pocket pies are made, I only needed to reheat them in a toaster oven for 3 minutes (toast heat setting). To make the dough, mix chilled butter(break it into pieces with hands in the flour mixture), all-purpose flour, salt, and suga, then add whole milk to the dry ingredients. Stir the mix together and form a dough. Once the dough is formed, start kneading it 20 times to create some gluten. Once kneading is done, cut the dough to pieces, the size of a jar lid. Finally, use a rolling pin (you can an emtpy wine bottle as well) to roll out each little dough to as thin as possible. Put some fillings (pizza fillings or jelly) towards one of the rolled out dough and close it up by folding the other side over.
Cooking was a great way to help me relax. Not only was I able to learn some new cooking techniques, but I was also able to manage my studying time more efficiently; most of my cooking was done by microwave or toaster oven from there on.
What do you eat when you are busy?
Tags: Diet
posted on October 31st, 2008 ·

I will be taking a few days off from updating The Sweaty Guinea Pig because I am currently busy studying for my biochemistry mid-term on Monday. Thanks for understanding, see you on Tuesday, and don’t forget to vote!
Tags: Exercise · Miscellaneous
posted on October 31st, 2008 ·
My friends and I hosted a party last weekend and we had some leftover pale ale on tap after the event. I took some pale ale home and decided to go on a culinary adventure on cooking with beer. I posted my question about cooking with pale ale on one of my favorite food blogs, The Kitchn, and the writer was kind enough to do some research and answer my question.
After going through all the recipes provided, I decided to make a loaf of beer bread. The procedures were extremely simple. I mixed the dry ingredients - flour, sugar, baking powder, and salt, with 12-oz. of beer first, then I stirred the mixture until a wet dough is formed. To make the bread, I poured the wet dough into a loaf pan and baked it in a 375-degree oven for 45 minutes, or until golden brown on the outside. This quick bread recipe is excellent because it does not require any special culinary tools; a big mixing bowl and wooden spoon (or spatula) will be just enough.
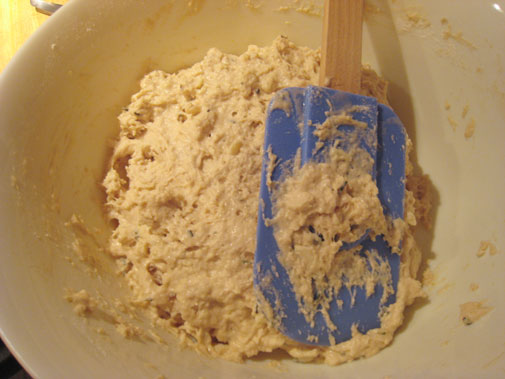
The wet dough.
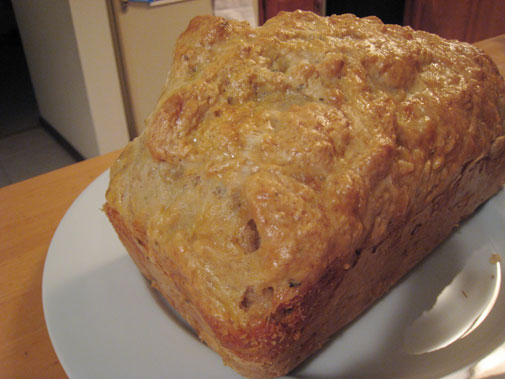
45 minutes later…voila! A loaf of beer bread. I like the rough-looking exterior.
Hard and crispy on the outside, moist and soft inside.
Do you have any exotic bread recipes? and what have you cooked with beer?
Tags: Diet


